Page 1 of 3
My first TF536
Posted: 19 Jan 2021 19:46
by Lynxman
I soldered my cpu directly to the PCB and snipped off the pins underneath. It fits under the keyboard with clearance now in my zombie 500+. It's in the way of one of the RF shield tabs though.

- TF536-04.jpg (131.32 KiB) Viewed 5139 times
Running at 40 MHz. Waiting for 100 MHz oscillators to get here to get to 50 MHz.
Re: My first TF536
Posted: 19 Jan 2021 20:31
by Mark Sealey
looks tidy...nice one
Re: My first TF536
Posted: 20 Jan 2021 01:12
by Lynxman
The TF536 has better compatibility with WHDLoad games than the TF534. All the games I couldn't get working before now work. Zeewolf 1 and 2, Joungle Strike 2MB version, F18 Interceptor would crash with TF534.
Re: My first TF536
Posted: 20 Jan 2021 10:54
by PaulJ_2.0
What's the deal with the two RTC?
Nice build BTW
Re: My first TF536
Posted: 20 Jan 2021 11:52
by supaduper
I`ll answer , some A500 ram expansions had RTCs because only the A500+ had an RTC the first A500 did not
Re: My first TF536
Posted: 20 Jan 2021 18:02
by Lynxman
Yes. I originally built that red RAM expansion for my A500, and when I got this A500+ I moved it over the the A500+ because it has room for another ram chip to give 1 MB extra chip ram. I then put another old school expansion that only could have 512 kB in my old A500. I omitted the motherboard battery because of the clock on the ram board and it seems to work fine. It's more practical to have battery access from the expansion bay anyway.
Re: My first TF536
Posted: 21 Jan 2021 19:44
by Lynxman
I cut the corner of the TF536 so that the RF shield will fit. There's a capacitor on the bottom that prevented me from cutting further in but it fits after bending the leg on the shield slightly. I could move the cap over to the leg of the chip but this will do. Stephen if you want to make it so that it doesn't nee a relocator that's all it takes. If the 68000 socket headers were moved down to the edge it would alsowork and the CPU could probably be fitted with a socket as it would sit farter in.

- TF536-06.jpg (94.24 KiB) Viewed 4948 times
I also cut slots in the shield to give room for my expansion door CF holder. Almost looks factory.
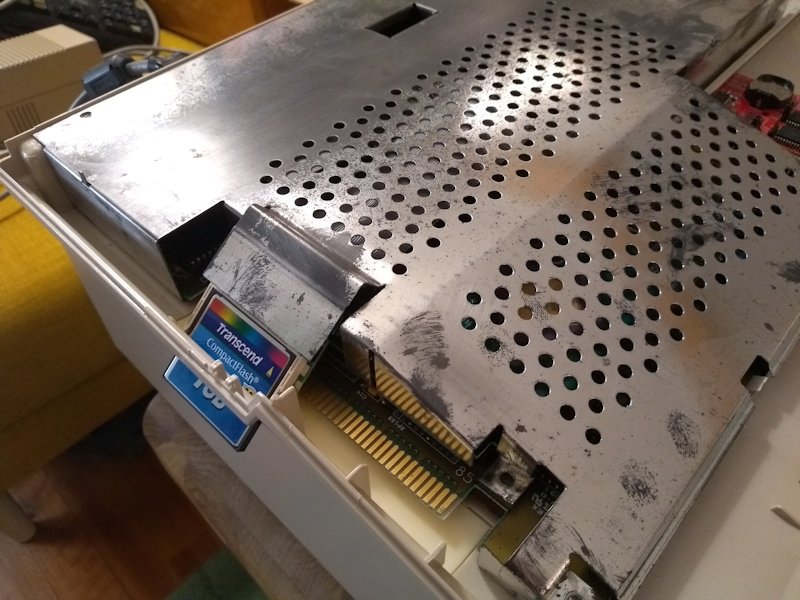
- TF536-05.jpg (100.26 KiB) Viewed 4948 times
You can download my 3D printable expansion doors here:
viewtopic.php?t=2365&start=160#p56297
Re: My first TF536
Posted: 21 Jan 2021 20:20
by 8 Bit Dreams
Wow! Hopefully You was prepared to see fireworks on power on, since these are four-layer boards. Cutting them may short out GND and VCC inner layers.. :shock:
Re: My first TF536
Posted: 21 Jan 2021 20:53
by go0se
8 Bit Dreams wrote: 21 Jan 2021 20:20
Wow! Hopefully You was prepared to see fireworks on power on, since these are four-layer boards. Cutting them may short out GND and VCC inner layers.. :shock:
Where's your sense of adventure?? :lol:
Re: My first TF536
Posted: 21 Jan 2021 23:35
by Lynxman
I checked off course. :)